Showing posts with label Tutorials. Show all posts

Multi-Color Italian Meringue and Rainbow Cupcakes


These are two decorating techniques to make Italian meringue, or any frosting of your choice into a multicolor frosting to decorated your cupcakes or cakes. For these cupcakes I used the vanilla cupcakes recipe. How I do the rainbow cupcakes you can check it out HERE.


Take a look at my step by step in photos of how I do a rainbow effect and pastry bag striping on Italian meringue: HERE

En español: AQUÍ


The LORD loves righteousness and justice; the earth is full of his unfailing love.- Psalm 33:5

DECORATED COOKIES with PEARL DUST and ROYAL ICING ROSEBUDS


Each time I decorate cookies with icing I enjoy it more than the previous time. On this occasion I made some "rosebuds" with icing using a pastry bag and petal tip. I also used pearl dust it's very much like luster dust, I had a bottle of it lying around and I am glad I finally found another way to use it.

I love how these cookies came out and named them "Princess Tiana Cookies", after my beautiful niece. They were made as a gift for my daughters and several friends. I feel these cookies go well with my personality  because of the flowers and subtle sheen, therefore, I present this post with great joy.


The rosettes or rosebuds did not come out all the same, instead, I gave them each a there own style making them slightly different. As soon as I heal from my sore right arm, I will practice some more to achieve a rosebud that is more defined. I do however believe that how they look is not something to worry about because even the buds that came out looking kind of funny, as soon as you place some leaves and lust on  them they'll look fantastic. The good thing is that you can do lots of rosebuds in different colors, shapes and sizes. When dry they can be stored in plastic containers and use when you want it in cookies, cupcakes and cakes.


How to video for these little rose buttons:


What you'll need:

To make rosebuds:
Strong consistency icing: HERE (if only making a few, use only a quarter of the icing and leave the rest for the cookies)

Tip # 101 (rosebuds and petals)
Tip # 67 or # 352 (leaves)
Flower nail
1'' squares of wax paper  

For Cookies: 
Cookie recipe: HERE
Icing: HERE
Tip #2 (outline and flooding)
Dried icing rosebuds or flowers
Pearl dust
Two soft brushes, one small and one larger


Steps:
1. Make cookies and icing. Leaving some icing with a very strong consistency to make flowers. Let flowers to dry overnight. Decorate cookies desired color and allow to dry overnight. Reserve a bit of icing to glue the flowers the next day and also to do the leaves. With cookies and flowers all ready continue:


Note: You can use pearl dust to give a touch of sparkle and pearl glow to bows, flowers or any details made of fondant, gum paste and royal icing. It is easy to use, to apply, use a dry soft artist brush, using very little on the surface you want to add sheen. You can also wet a small amount of dust with a few drops of vodka or vanilla and use it as paint to color decorations. It is edible and is approved by the FDA. You can find this product in a specialized pastry shops or online. I saw it in  NY Cakes.


2. Powder  should be applied gently to the flowers with a dry soft brush, a small amount of dust, is more than enough.


3. I wanted some cookies to have sheen so I also did the same application procedure as in the flowers but with a larger brush. The brush should be soft to avoid damaging the finish of icing (either fondant or icing).


4.  The powder is ready at once, there is no need to wait a while before placing the flower or decoration.

5. Place a dot of icing and then glue the flower. Make the dot small enough or else it will spread outside the flower's border.


6.  Then go with the tip #67 and add leaves for garnish. Let dry and voila, our Princess Tiana Cookies are ready to please yourself or our loved ones.

For me every day of the year is special for LOVE and FRIENDSHIP so although I published these heart shaped cookies after February 14, it is still valid. I love heart shape everything and with the 20 + heart shape cookie cutters I have, you'll see lots of hearts around this blog!

If you need an excuse... these cookies will be a great gift for, your cousin on her birthday, the neighbor's anniversary, Easter and for our Mothers ....... YES, I know you thought about these cookies for Mom. I pictured them in a beige or cream tone for mom, and maybe light blue for me : )  I Hope you liked the idea of the flowers and pearl dust for cookies, and have enjoyed this post as much as I did.


En español: AQUí


So whether you eat or drink or whatever you do, do it all for the glory of God. Do not cause anyone to stumble, whether Jews, Greeks or the church of God — Corinthians 10:31-32 


Thanks for following and have a blessed week,

Gingerbread House How To


What fun it is to make a gingerbread house! Due to lack of time and fear I had not dared to make one before, but now I have finally made my first gingerbread house! I started to make it by stages when I had free time and it was a very joyful experience, but I have to admit there are many steps to follow. I will share what I learned throughout the process and hopefully it is of great use to you.

Although I have experience in pasting cakes and cookies decorations with royal icing, I decided to try something new, and used a caramel syrup to glue the house instead. It was a total failure.  The gingerbread house parts stuck together well and fast, but the next day the caramel began to melt. Maybe it happened because the climate where I live is very humid or because I had to use a little more sugar and let it cook for less time. Experienced learned, next time I'll stick with the ideal glue for these projects ... ROYAL ICING!


The recipes I used were the Gingerbread Cookies and Royal Icing. I do recommend both of them.

In case you're interested in the caramel syrup recipe that I used, (but I do not recommend it): 1 ⅓ cup sugar and ½ cup water. Boil until it thickens and begins to take a light caramel color (about 15 minutes). Note: After the fire is turned of, the caramel continues to get darker in color so do not let it turn too dark before removing from the fire. I did not know this and my caramel came out to dark. It also cools quickly, so you must build the house as quickly as possible.


Tips to make your gingerbread house either this year or next year. Do not doubt...it is super fun to make one!

1. Follow the procedure of the gingerbread cookies, but in step number six to leave the extended dough in the refrigerator for an hour or more before cutting.
2. Cut all piece that form the house. You can find the templates I used, HERE. For the roof cut out a 7" x 7.5" (17.5 x 19 cm)rectangle. After having the pieces cut, place gingerbread cookies on a cookie sheet (I very lightly grease it with bakers grease) and return to the refrigerator to chill,  ideally for at least 15 minutes until you are ready to bake them. This will help the cookies retain their shapes a bit better.
3. Preheat oven to 375 º F (190 º C) and bake for an appropriate time depending on the size of the pieces.
4. Right after removing the cookies from the oven, while they are still warm, lay the cookie cutter molds or paper templates on top and with a sharp knife cut away any changes in size that could have taken place while baking.
5. Cool completely before assembling. To glue the pieces I recommend using royal icing.


Place enough icing to stick together. In these picture you see the pieces put together with the caramel syrup, but I decided to reinforced with icing when I saw the mess the caramel made. You could tint the icing you'll use as glue a lite brown color if you prefer.


The windows of course had to be hearts I am in love all year round with hubby : ) You may cut the windows and door with cookie cutters or knife before you bake.


I kept the design pretty simple, but I loved it. After everything is in placed and all decorations are piped with a decorating sleeve, sprinkle powdered sugar on roof top and all around to make it look like snow.


En español: AQUI


Then Jesus said to them, “Watch out! Be on your guard against all kinds of greed; life does not consist in an abundance of possessions.”- Luke 12:15

Próxima entrada como hacer estas snowman cookies.

Sweet Pear Chips


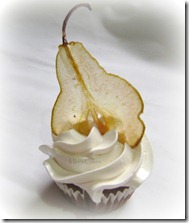
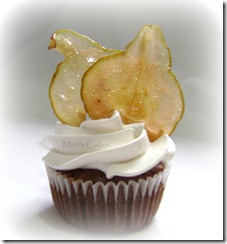
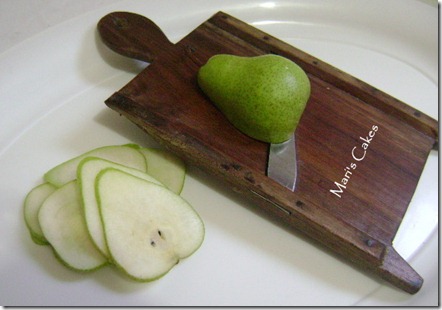
I love fruit decorations on cakes, cupcakes, and desserts in general, so, when I saw these pear chips, I fell in love with the idea. I am thrilled to share this sweet and crisp idea with you because I know it will be useful for fall/winter desserts and cakes. To achieve nice chips, use a blemish-free pear that is not quite ripe. A mandolin will be of great help to get perfectly even pear slices.

Versión en español: Chips de Pera


Pears
 
How to Make Pear Chips
 
Ingredients:
1 cup sugar
1 cup of water
1 small underripe Bartlett pear
1 lemon, halved


Preparation:
1. Preheat the oven to 200˚F. line a large baking sheet with parchment paper or a nonstick baking mat (such as a silpat); set aside.

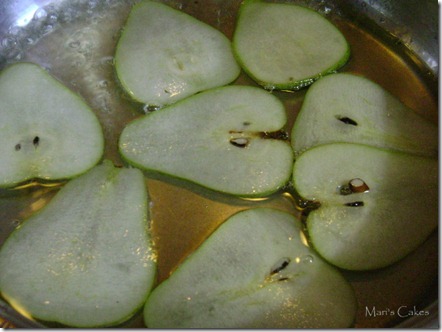
2. In a medium saucepan over medium-high heat, combine the sugar with one cup of water. Bring to a boil; cook, stirring occasionally, until the sugar has dissolved, about 8 minutes. Reduce the heat to medium-low; keep at a simmer as you proceed.

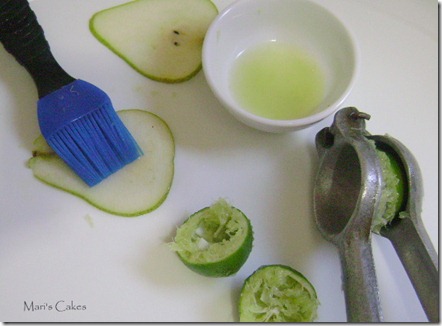
3. Using a mandolin or a very sharp knife, slice the pear lengthwise as thinly as possible, making sure that each slice remains intact and is uniformly thick. Do not worry about removing the seeds or the core (they soften during baking). Squeeze lemon halves over pear slices, coating both sides with juice. Place the slices in the simmering syrup and cook for two minutes. Remove the slices with a slotted spoon and place them on the prepared baking sheet about 1 inch apart.

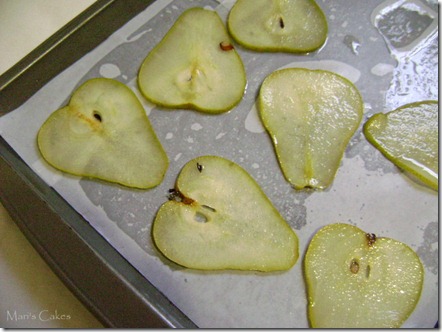
4. Bake with pear slices until they are dry to the touch, about 2 hours. Using a small offset spatula, loosen the edges of the slices; use your hands to peel the pears from the sheet, then flip them over. Return to the oven; bake, checking frequently, until chips are dehydrated and crisp (but not browned), about 20 minutes. Chips can be kept in an airtight container at room temperature, layered with parchment paper, for up to 2 days.

Makes about: 18.

Note: Be patient and cook at 200˚F for 2 hours like the order of the instructions. I was trying to hurry because I had to decorate some cakes and I increased the temperature to 220˚F in the last 15 minutes and they over browned. The wait is worth it because they make a delicious and elegant decoration. the great news is mine were not damaged, they still were soft and tasted great! I guess if you are looking for a darker tone then it is OK to cook longer.

Recipe to make these Spiced Pear Cupcakes, HERE.

Pear cupcake 006-1 Cupcake con chips de pera, suspiro, bizcocho dominicano Cupcake decorado, suspiro, dominicano


Mandolin y pera 
Pear chips

If you like this lemon press, you can buy it HERE.

 
Peras en almibar 
Peras en sarten, Mari's cakes


En español: Chips de Pera

Let us not love with word or with tongue, but in deed and truth. - 1 John 3:18


Sharing is SWEET, forward to those you know will love this idea as much as you.

Baby Bootie Mini Cakes

Baby Booties 2

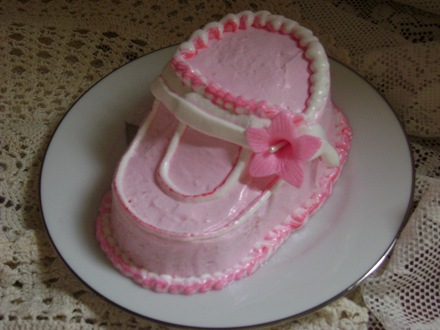
A few months ago I saw these Baby Booties at the Martha Stewart’s website, and right away I new I had to make them. They are so beautiful and perfect for a baby shower. You can do one for every guest or a pair to use as a cake topper. I hope you like it and decide to make them. I filled the tall part the boot with Dulce de Leche, I also used the Spongy Vanilla Cake recipe for the sheet cake and decorated it with Suspiro (Dominican Frosting).


What you’ll need:
Sheet Cake of your favorite recipe (9x13 )
Frosting 
Food coloring, as desired for shoe color and decorative details
Apricot, or other fruit leather, cut into 1/2-inch wide strips, for straps, if using
                                              
Directions:
 Como se corta un mini cake
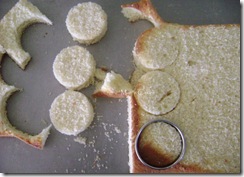
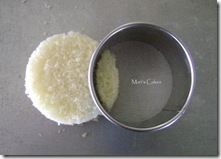
1. Each bootie consists of two cake rounds of different heights. To make booties, trim top of sheet cake so it is level. Place trimmed cake on work surface. Using a 2 1/2-inch biscuit or cookie cutter, cut out 12 circles from cake, keeping the circles as close together as possible. Discard the scraps or save for a delicious snack.


 martha's Stewart, baby botties
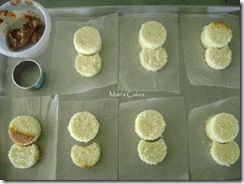
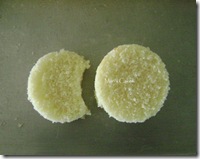
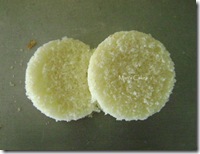
2. To make toe pieces for booties, cut four circles in half horizontally, making eight shorter circles. Trim each short circle by cutting a straight line 1/2-inch in from the edge. I used a round cookie cutter because it fits much better that way. Place one tall and one short circle on a piece of waxed paper or parchment. Using a dab of buttercream as glue, affix trimmed edge of shorter circle to taller one. This forms the basic bootie shape. Repeat with other pairs.


How to do a baby boot mini cake minicake 1 minicake
3. Using an offset spatula or a butter knife, thinly coat each bootie with a layer of buttercream to seal in the crumbs; giving the shoe shape by adding more icing to the front and top. Refrigerate the booties until the crumb coat has set. Decorate the booties one at a time. Remove from the refrigerator, and cover with a final coat of buttercream, shaping and smoothing the shoes as you go. NOTE: If you are using Dominican Frosting do not refrigerate.

4. Pipe laces and trim to resemble a child's shoe. To make dots and trim, use a No. 4 tip. To fashion thin, dainty laces and other delicate details, use a No. 3 tip. To pipe small stars, use a No. 13 tip. Chill booties again until buttercream is firm (Suggested only for Buttercream or Swiss-Meringue Buttercream), then transfer to serving platters. Makes 8 cakes
Where I got the idea: Baby Bootie Cakes http://www.marthastewart.com/
 
uniendo el minicake de botitas con suspiro


botins de bebe


Mini cakes


Dulce de leche Cake, en mini botita

Dedicated with much love to my newborn niece Dahlia, God Bless! Congratulations and hugs to my brother and sister–in-law!

“But if we walk in the light, as he is in the light, we have fellowship with one another,” –John 1 1:7

Recipes and Tips