Authentic Dominican Habichuelas con Dulce Recipe: A Sweet Bean Delight!


sweet cream beans


The habichuelas con dulce, also known as sweet cream of beans or sweet beans, is a quintessential Dominican dessert. It's a tradition to prepare it during Lent, particularly Holy Week, in Dominican households. 


Each family imbues their sweet beans with a unique touch, and I strive to recreate the flavor of my mother's version by incorporating freshly ground nutmeg and ginger. While some opt for canned beans, evaporated, and condensed milk, I prefer the traditional approach, using whole milk and beans, reminiscent of our grandmothers' recipes, for an unparalleled taste experience. This dish is delicious and unique and a symbol of Dominican culinary heritage.


Sweet crackers used for this recipe.

dominican republic

Some Batatas from our farm. 


I had to include this picture of the fresh ginger, there something about it I like :)


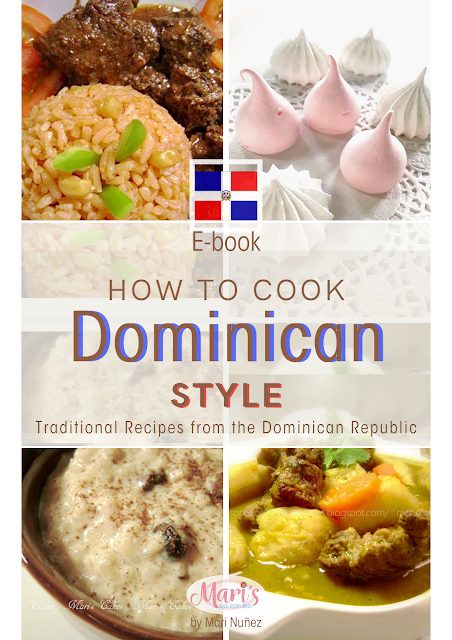
Habichuelas con Dulce (Dominican Sweet Beans)

Authentic Dominican Habichuelas con Dulce: A Sweet Tradition for Lent. this serves 12-15 servings approximately. You can easily reduce this recipe to half if less serving is preferred. Get a PDF with the recipe for 6 servings: PDF recipe.

Ingredients: 
  • 2 ½ cups (1 pound) red or pinto DRY beans, measure then cook, step#1
  • 2 cinnamon sticks
  • ½ teaspoon of ground cloves or to taste 
  • ½ teaspoon of ground cinnamon or to taste
  • 1 teaspoon freshly ground nutmeg
  • 2 ounces of fresh ginger mashed or ½ teaspoon of ground ginger (powder)
  • 5 cups of whole milk (may be substituted with evaporated milk)
  • 1 can (13.5 oz = 2 cups) of coconut milk or fresh milk of one coconut  
  • 1 teaspoon of salt
  • 3 cups sugar or to taste
  • 2 Tablespoons margarine or butter
  • 2 pounds of boniato (batata) peeled, cut into squares, and boiled
  • 1 cup of raisins
  • Sweet crackers, galletas de leche de Guarina (as much as you like)

Instructions: 
1. Measure the dry beans, clean them by picking out any small rocks or leaves, and wash the beans.  Cook the beans until soft in approximately 2-3 liters of water, enough to cover them. I use three liters (approx. 13 cups). This takes about 2 hours in a regular pot or 30 minutes in a pressure cooker.
If you have time, a tip to soften the beans faster is to soak the dry beans in water overnight. The next day, drain the water from the beans and then bring them to a boil with the amount of fresh water I indicate and cook until they are tender. This step is recommended but not needed. I have made great habichuelas con dulce without soaking the beans the night before.

2. Once beans are soft, blend them with the water they were cooked in (approx. 8 cups) and strain the mixture twice, adding a little milk if necessary to facilitate straining, and strain it over the pot where you will cook it.

3. Combine the milk and coconut milk, stirring well. Add in the sugar, salt, and all the spices except for the nutmeg.

4. Bring the mixture to a boil over high heat, stirring constantly with a wooden spoon for approximately 15-20 minutes (less time may be required if using a large pot). Reduce the heat, then add the pre-cooked sweet potatoes cut into cubes, along with the raisins. Simmer for an additional 10 minutes or until the mixture thickens slightly.

5. Just before removing from heat, stir in the butter and 1 teaspoon of ground nutmeg, allowing it to cook for an additional 5 minutes.

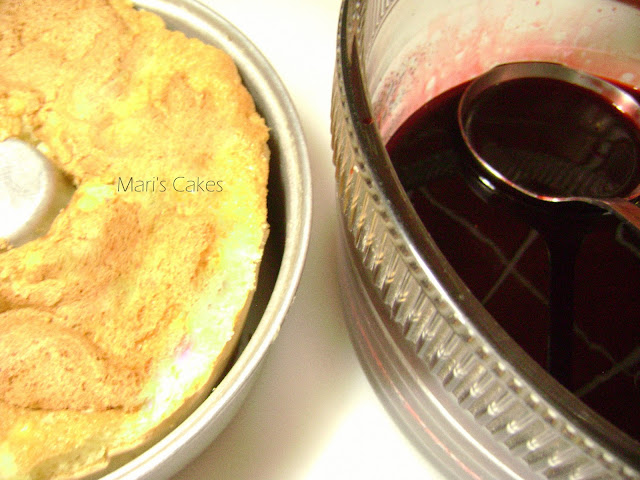
6. After cooling off for at least 15 minutes, serve and top the serving dish with sweet crackers. Refrigerate once cooled and serve either hot or cold.


Notes:
a) In step #2, if you prefer it ok to strain the mixture only once. 

b) I've suggested using 3 cups of sugar for this quantity of sweet beans, as I prefer a less sweet taste. Adjust the sugar amount to your liking.

b) For further inquiries and additional information about this recipe, refer to the article "Sweet Beans, Habichuelas con Dulce."


And he died for all, that those who live should no longer live for themselves but for him who died for them and was raised again. ~ 2 Corinthians 5:15


Drunken Dominican Cake, Bizcocho Borracho


Hello, it's incredible how quickly February 14th has arrived! Wasn't it just yesterday that we were celebrating New Year's? This month is flying by! Today's recipe is a much-loved classic sponge cake, Bizcocho Borracho. For those seeking a Valentine's Day dessert, this is a perfect choice with its vibrant red color. It might even be considered an alternative to red velvet cake, though I'm not entirely sure about that :)

This spongy cake is made without butter and is moistened with a syrup made of sugar, water, red food coloring, and rum. While it's not as commonly found in bakeries as it used to be, it remains a classic favorite for Dominicans. My husband has childhood memories of this cake being sold by a street vendor carrying a wooden box on his head. On the other hand, I fondly remember the "helado borracho," or drunken ice cream, which used to be my favorite. Can you imagine my disappointment when I found out that this ice cream had been discontinued? This tragic and unfair reality fueled my eagerness to learn how to make this cake, and now I have my own version of the recipe.

I had intended to bake this cake last Christmas and share the recipe with you, but time slipped away from me. I'm thrilled that I've finally published it as promised and fulfilled the requests of many readers who have been asking for this recipe. Hopefully, you'll be able to prepare this recipe at home soon.


Why isn't this cake sold as much as before? The reason is that the delicious, intense pink raspberry extract is no longer available in local stores and supermarkets. What's being sold now is an imitation concentrate used to flavor food products in general, but it doesn't taste like the original. We call it "frambuesa," and it is the most important ingredient in this cake because it adds the dark red color that characterizes this drunken cake.

Why so much coloring? First, I would like to clarify why it has to be a dark red wine color. The original recipe was made with red wine, but to make it more economical or suitable for children, frambuesa was used as a substitute for the wine. From there came the infatuation with the intense red wine color. For this recipe, you will see that a lot of coloring is used, something that I don't usually like, but for this cake, I do. I should also clarify that it is not necessary to use coloring; you can use less or none at all. There are several versions of this recipe, and today I will share my version and how I substitute the frambuesa.


Bizcocho Borracho

(Mari's Cakes version inspired and translated from the book (Mujer 2000)


For the cake:
5 eggs (yolks and whites separated)
1 cup granulated sugar (200g)
1 cup + 2 tablespoons all-purpose flour, sifted (145g)
½ teaspoon of baking powder (omit if using wine)
¼ teaspoon salt

For syrup:
1¼ cups sugar (250g)
2 cups water (437ml)
½ cup of red wine or rum (118ml)
2 ½ teaspoons of red food gel coloring (optional)
3 drops of blue food gel coloring (optional)
1 tsp. raspberry extract (optional)

To Sprinkle on Top (optional):
¼ cup powdered sugar (32g)
¼ teaspoons cinnamon powder


The recipe calls for 2 tablespoons of cinnamon to ¼ cup of powdered sugar, creating a cocoa-colored sugar. I enjoy the contrast of the white sugar against the red, so in this recipe, I use less cinnamon to achieve a soft beige color instead. I do use both sugars. There is a photo almost at the end of the post that shows the cake with both sugars, and I believe using both makes it look interesting.


Preparation:
1. Preheat oven to 350 °F (175 °C). Grease and flour an 8 x 10-inch rectangular cake pan, or one tall 9-inch round tall pan. 

2. Separate the yolks from the whites and beat with a half cup of sugar until pale yellow and foamy (on speed # 8 / high for 2.5 minutes). 


3. In a large bowl beat the egg whites with the remaining half cup sugar until soft peaks form (on speed # 10 /high for 1 minute). Incorporate the beaten egg yolks and flour into the egg whites by folding- stirring gently to keep air bubbles in. Pour batter into the prepared pan. Bake 20 - 30 minutes or until it is golden and when inserted the toothpick comes out clean. Remove from the oven and allow to cool in the pan.


4. Prepare the syrup: combine water and sugar, bring to moderate fire, and boil for 10 minutes. After it has cooled, add the rum or wine, coloring, extract and mix. Bathe the sponge cake with syrup until it is completely soaked, and bring to refrigerator. Sprinkle cake top with the mixture of powdered sugar and cinnamon before serving. This cake can last up one week in the fridge. Serve cold. ENJOY!


If you pour the syrup onto the sponge in the same pan where it was baked, instead of cutting it into slices and placing them on a tray as indicated in the notes below, you can follow the process of pricking holes in the surface of the cake with a knife or skewer. This will help the cake absorb the syrup much better. 


Notes:
a) You can also moisten cake as follows I find this way easier):  cut into slices, put them lying flat on a tray, soak with the syrup, sprinkle with cinnamon sugar and place them on a plate or in individual doilies. Although I used a bundt cake pan, I do not recommend it if you are just learning to make cakes. This cake is very soft due to being soaked in syrup and it can break while unmolding.


b) Decorate as you please with Meringue – use half of this recipe: Meringue Frosting.


c) This cake will rise very high in the oven and might shrink a little due to air incorporated in the beaten eggs and a small amount of leavening agent used, if this happens it is OK.


If you have people in your life to love, you are rich. - J. Osteen


Check out my E-books and exclusive recipes at Mari's E-books.

Teddy Bear Bread


Hello! I have to say that I am very happy with the emails and photos I have received from readers that have made the Mandarin cake. I am so glad that you liked it and that it was a success in many of your homes. Thank you all for you your wonderful and grateful emails. Today I baked a TEDDY BEAR BREAD. I’ve had this bread recipe for a while and I finally got to taste it. This bread has a good crumb and great taste.

Different from what it is customary to give around this time, I think this particular homemade bread is a good alternative to show some love to a dear one or friend. The following recipe's yield is two breads, so you can give one and eat the other. This bread recipe is also ideal to serve on children birthdays or in baby showers. I hope you like this idea and make it with great success. If you do I would LOVE to see your photos on our facebook wall.


I thank my husband for helping me knead this bread. He makes every bread we make taste better :)  Enjoy this very short video of the process.


Teddy Bear Bread
(Taste of Home's Breads)

Ingredients:
1 package (1/4 ounce) active dry yeast
1 ½ cups warm water (110˚F 115˚F)
½ cup warm milk (110˚F 115˚F)
3 teaspoons butter or margarine, softened
3 teaspoons sugar
2 teaspoons salt
5 ¼ to 5 ¾ cups all-purpose flour
12 raisins
1 egg
1 tablespoon cold water
Ribbon, optional


Preparation:
1. In a mixing bowl, dissolve yeast in warm water. Add the milk, butter, sugar, salt and 3 cups flour. Beat until smooth. Stir in enough remaining flour to form stiff dough. Turn onto a floured surface; knead until smooth and elastic, about 6-8 minutes. Place in a greased bowl, turning once top. Cover and let rise in a warm place until doubled, about 1 hour.

2. Punch dough down. Turn onto a lightly floured surface; divide into four portions. Cut one portion in half; shape into balls. Cut another portion into 14 pieces; shape into balls. Shape remaining two portions into balls. To form bear body, place each large ball in the center of a greased baking sheet. Place a medium ball above body for head; flatten slightly. Place two small balls on each side of head for ears. Place one small ball in the center of head for nose, and four small balls around body arms and legs. Cover and let rise until doubled, about 1 hour.

3. With a sharp knife or scissors, cut slits for ears, eyes, nose and belly button. Insert raisins into slits. Beat egg and cold water; brush over dough. Bake at 375˚F (190˚C) for 20-25 minutes or until golden brown. Remove from pans to wire racks to cool. If desired, tie a bow around bear`s neck with ribbon.

Yield: 2 loaves.


Sent to Yeastspotting.

There is no fear in love. But perfect love drives out fear. ~ 1 John 4:18

Recipes and Tips