Showing posts with label Chocolate Delights. Show all posts

Chocolate Nutella Brownies


En Español

I am starting the week with a chocolate and Nutella treat. When it comes to desserts and traditional American favorites, brownies could be one of the most popular if not the favorite of them all. Depending on their density brownies can be of either fudgy, cakey, or moist. They are also called blondies when prepared without chocolate.

These brownies have nutella in them and that makes them spectacular! I am sure you will like them very much. I have waited a too long to share a recipe for brownies, but here goes, a very rich and delicious brownie recipe! Get your nutella bottle and enjoy this decadent chocolate dessert.

This post is dedicated to my lovely daughters who always eat all the nutella and leave the empty bottles in the pantry. I love you girls!


Irresistible Chocolate Pear Cake Recipe: A Seasonal Delight


Are you a fan of the irresistible combination of chocolate with fruits?

Then, you can't afford to miss out on this delicious chocolate pear cake recipe that I've prepared especially for this season. In my home, we enjoy it whenever I can get fresh pears or simply when I want to make something easy and delightful.


Although it doesn't contain spices, this Chocolate Pear Cake recipe is exquisite and perfect for the fall and winter seasons, inviting us to enjoy something simple yet comforting. Best of all, it's not overly sweet, thanks to the perfect balance of sweetness. Its appetizing flavor is complemented by a soft and moist texture, provided by the juicy pears and the delightful chocolate sauce. I invite you to try it and learn to create a moist and flavorful dessert that brings together the intensity of chocolate with the natural sweetness of pears!


Chocolate Pear Cake

Ingredients:

For the pear cake:
- 2 pears, peeled, cored, and sliced into wedges (I used d’anjou pears)
- ¾ cup of butter at room temperature
- 1¼ cups of brown sugar
- 3 eggs
- 1½ cups of all-purpose flour
- ⅓ cup of cocoa powder
- 1 teaspoon of baking powder
- ½ teaspoon of baking soda
- 2 tablespoons of milk
- 1 teaspoon of almond or vanilla flavoring
- Pinch of salt
- Powdered sugar for topping (optional)

Chocolate syrup:
Get the recipe here: Dark Chocolate Syrup


Instructions:
1. Preheat the oven to 350˚F (190 ˚C). Grease a 10-inch springform cake pan and line the base with wax paper.

2. For the Chocolate Cake: In a mixer cream together the butter and brown sugar until it is pale yellow and creamy, about 5 minutes. Add the flavoring, then add the eggs one by one, beating well after each addition.

3. Measure and sift together the flour, cocoa powder, baking powder, baking soda, and salt. Incorporate into the creamed butter mixture and fold in gently until all of the ingredients are combined.

4. Add the milk, stir, and then pour the mixture into the prepared pan and level the surface with a spatula. Gently arrange the pear slices in a radiating pattern over the cake batter.

5. Bake at 350˚F (190 ˚C) for about 55 minutes or until the cake is firm to the touch. The center fully cooks in the last ten minutes. Leave the cake to slightly cool in the pan, and then transfer to a wire rack until completely cold before serving. If you are going to serve it with chocolate syrup, then get the recipe here: Dark Chocolate Syrup.

Enjoy this chocolaty pleasure!


If you enjoyed this recipe, you may also love this one:


"Be sincere in your love for others. Hate everything that is evil and hold tight to everything that is good. 10 Love each other as brothers and sisters and honor others more than you do yourself." - Romans 12:9-10 

Chocolate Sugar Cookie


This is one chocolate cookie dough recipe you will love to have at hand. This is a variation of the "sugar cookies" recipe  that I use for all my decorated cookies with icing. This dough could be rolled easily without cooling, but I do recommend that after rolling you refrigerate as this helps the cut out cookies to be more defined and to hold their shape when transferring from the work table to the baking sheet. After baked these remain the same sizes, have a perfect texture and a rich chocolate flavor. You got to try them.

How to Make Modeling Clay with Chocolate Candy Melts


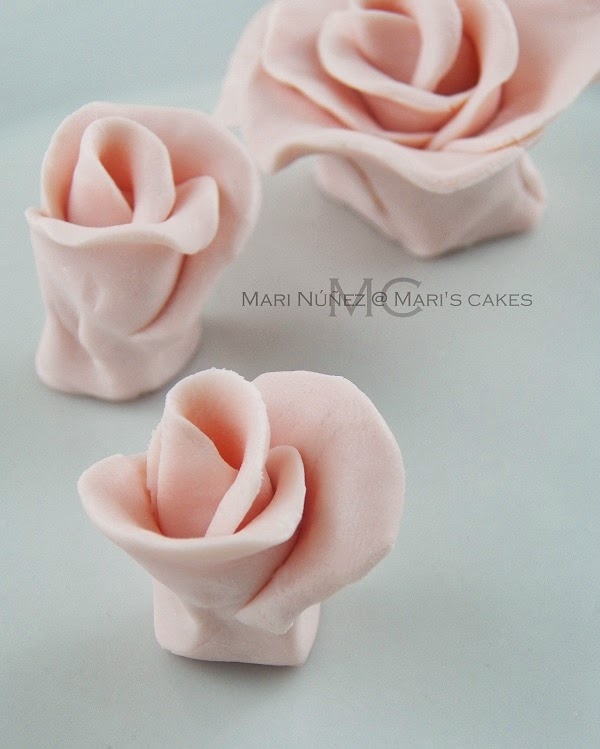
If you enjoy making fondant flowers and decorations, then working with chocolate modeling clay is a true delight. The edible flowers created with this clay are not only enticing but also luscious, making them a must-have for any dessert. With only two ingredients needed, this chocolate clay is simple to make and can be done in no time at all.


The weather in my area hasn't been ideal for working with modeling chocolate, which is why I haven't shared any of my creations until now. However, I have found that candy melts are more resistant to heat, so I have been using them to make cake pops. Recently, I decided to try my hand at making chocolate roses. While they may not be perfect, as they are my first attempt, I plan to use them on a cake I am making for my daughters.

Have you ever worked with candy clay before? What types of decorations do you typically create with candy melts? Share your experiences and creations with us!


Chocolate Modeling Clay 

Ingredients: 
14 ounces candy melts (397 g)
cup of corn syrup (79 ml)

Instructions: 
Melt chocolate in microwave or bain marie following package instructions and be careful not to overheat. Stir the chocolate until it's completely melted and once it has cooled to room temperature (cool to the touch) add the corn syrup.

With a spatula gently stir scraping the sides of the bowl until the corn syrup has fully incorporated and blended with all the chocolate. It takes about a minute, and the mixture should look like a ball of cookie dough. Be careful not to over mix or you will damage the mixture and the chocolate will break up into pieces. Pour the mixture onto a plastic sheet and spread a little and wrap. Leave to set overnight at room temperature.

The next day your chocolate clay will be ready for you to mold into any shape or decoration your heart dictates. Enjoy!!

Notes: To color chocolate clay add drops a knead in after the clay has set. Only use candy colors or powder candy colors since they are oil-based and won't cease the modeling clay. I use an oil-based candy color.  A little color can be added to the chocolate at the time of adding the corn syrup and no further mixing is required; however, if a lot of color is going to be used to make a very bright or dark color, then the amount of corn syrup must be adjusted since less of it will be needed to compensate the color amount used.


Cool References:
Melting chocolate tips
How to make a chocolate rose
Introduction to moldeling clay
Lauren Sulser wonderful video below:


Lauren has made a wonderful video with the steps, except that the measurements are different and she uses gourmet chips (pure chocolate). The measurements she used are 1 pound of chocolate (454 g) and ½ cup of light corn syrup (118 ml).


“Flowers wilt, jewelry tarnishes, and candles burn out...but chocolate doesn't hang around long ehough to get old.” ― Sr. Cocoa Loca

Chocolate Lamington Bar Cake


Today I will be sharing one of my favorites, the Chocolate Lamington Bar Cake. This cake consists of  a chocolate sponge covered with a light chocolate frosting and coconut flakes, is delicious and ideal to serve on a special occasion, meaning.... Any day! To me all days are special and worth celebrating the blessing of being ALIVE. I hope you bake this Lamington Bar Cake soon. Enjoy!

This cake is based on the traditional Australian Lamington cake, named after Lord Lamington, a former Governor of Queensland, in the era of 1900's , who is credited with the origin of this dessert. Lamingtons are sometimes served as two cubed halves with a layer of cream and/or strawberry jam in between. It is commonly found in Australasian outlets such as cafes, lunch bars, bakeries, and supermarkets.

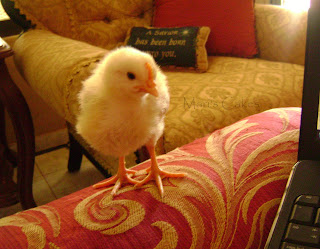
But before we go to the recipe, I would like to show my daughter's new pet, Pochungo.....sometimes country life is just wonderful :)


Now let's continue with the recipe -


It is a great tasting cake.


Chocolate Lamington Bar Cake
This cake makes the perfect dessert for any special occasion. Just imagine a chocolate sponge covered with a delicious light chocolate frosting and coconut flakes... delicious right? Enjoy! Recipe adapted from Baking.
 
Ingredients: 
For Cake
¾ cup unsalted butter or margarine room temperature
¾ cup superfine sugar
3 eggs
1 ¼ cup self-rising flour (see notes)
¼ cup cocoa powder

Frosting:
2 oz (½ cup) dark chocolate broken in pieces
4 Tablespoons milk
1 teaspoon butter
¾ cup confectioner’s sugar

To decorate:
½ cup coconut flakes
½ cup heavy cream whipped
1 ½ Tablespoons sugar

Instructions: 
1. Preheat oven to 350ºF. Lightly grease and line bottom of a 3 x 10 loaf pan.
2. Cream butter and sugar until light and fluffy. Gradually add eggs, beating well after each addition. Sift together flour, baking powder, cocoa powder.
3. Pour mixture into the pan and bake for 40 minutes or until toothpick comes out clean. Let cool for 5 minutes in pan then turn on to a wire rack to cool completely.
4. Mix chocolate chips, milk and butter in a heat proof bowl and place over a pan of hot water. Stir until chocolate is melted. Add confectioner’s sugar and beat until smooth. Let cool until frosting gets thick enough to spread. Cut a V shape wedge from the top of the cake, reserve cake wedge. Frost the cake and cover with coconut flakes.
5. Beat heavy cream with 2 Tablespoons of sugar until soft peaks are formed. Pipe a line of cream in the center, replace wedge back on, frost and ad coconut flakes, then pipe a row of cream on either side of the wedge of cake. Serve.  


Notes: 
a) If you do not have Self Rising Flour for this recipe you can substitute with 1 ¼ cup all purposes flour, ¼ teaspoon salt + 2 teaspoons baking powder. For more information on substituting Self Rising Flour see note i, at Dominican cake recipe.  
b) This recipe can be doubled easily.

Yield: 10 servings

En español: AQUÍ


Seek the Kingdom of God above all else, and live righteously, and he will give you everything you need. - Matthew 6:33

Chocolate Eggnog (Ponche de Chocolate)

recipe for Chocolate Eggnog


Indulge in the perfect holiday treat with our delightful chocolate eggnog, ideal for any festive occasion. Whether you're celebrating Valentine's Day or simply craving a rich chocolatey beverage, this recipe is a must-try for chocolate enthusiasts year-round.


Note: For those who prefer the classic vanilla eggnog, just omit the cocoa powder from the recipe.


Chocolate Eggnog

PONCHE DE CHOCOLATE, CHOCOLATE EGG NOG (15)
Ingredients:
4 cups milk
⅓ cup of chocolate powder
1 anise star
1 cinnamon stick
2 cloves
pinch of nutmeg
1½ teaspoon vanilla
1 ½ cups of Rum
8 egg yolks
2 tablespoons of sugar
1 can of condensed milk (1 ½ cup = 405 g)
1 can of evaporated milk (11 oz.)
¼ - ½ cup of sugar 
 

Preparation:
1. Bring to a slight boil the milk and chocolate, then mix in the anise, cinnamon, cloves, nutmeg, and one cup of rum minus 1 tablespoon. Reserve the tablespoon of rum for egg yolks. Let simmer until the spices release their aroma and the rum evaporates. Remove from heat, let stand covered for an hour, and then strain to eliminate the spices. Combined with condensed milk and evaporated milk. Add ¼ cup of sugar a little until the desired sweetness is achieved. Bring to medium heat, stirring constantly with a wooden spoon.

2. Meanwhile, beat egg yolks with 2 tablespoons of sugar, and vanilla until it's pale yellow and has doubled in volume. Add the reserved tablespoon of rum, beat for one more minute, and set aside.

3. When the milk mixture reaches a high temperature, but not a boil. Temper the yolks by taking a bit of hot milk and pouring it in a stream into the yolks while beating. Then slowly add the yolks to the milk mixture while beating rapidly with a whisk until combined. Continue stirring until it thickens and remove from heat.

4. Cool before pouring into properly sterilized bottles and keep in the refrigerator. Serve cold.


Note:
a) When cooled it thickens even more.
b) If you like, you can use more condensed milk and omit the sugar.


Yield: About 7 cups. Fills two medium size bottles.


PONCHE DE CHOCOLATE, CHOCOLATE EGG NOG (24)PONCHE DE CHOCOLATE, CHOCOLATE EGG NOG (25)Ma


recipe


If you enjoyed this recipe, you would love the recipe for:


And so we know and rely on the love God has for us. God is love. Whoever lives in love lives in God, and God in them.- 1 John 4:16

Chocolate Flan


I believe that all days should be days of friendship, love and are full of excuses to eat yummy desserts such as the one I present to you today. This flan is one of the desserts I will be making for Valentine's Day but I have to admit that I make it quite often.

This chocolate custard is exquisite, a classic among chocolate lovers and an alternative to the chocolate bon bons that are very much consumed this time of the year. This dessert recipe is simple and inexpensive, but this shouldn't make it any less delicious or elegant enough to be served on a special occasion.


Unlike the  vanilla flan which I do from scratch, for this flan I prefer to use the instant custard packets. This makes it easier to prepared because there is no need to use the oven and requires less time in the fridge.


Chocolate Flan 


Ingredients:
½ cup of semi-sweet chocolate chips or 2 ½ Tablespoons of cocoa powder
1 envelope (of 4 servings) of Goya Flan or Royal  brand
1 cup milk
1 cup cream
¼ cup sugar
1 teaspoon of vanilla


For the Caramel
½ cup granulated sugar  

Preparation:
1. Prepare the caramel (instructions below), caramelize the pan or pans where flan will go.
2. In a saucepan mix the chocolate and milk, heat until well blended and set aside.  
3. In another pot add the content in the envelope and cream, mix well, add previous mixture of chocolate milk and vanilla. Stir and cook in moderate heat just until boiling point.  
4. Remove from heat and pour into prepared molds or cups. 
5. Leave at room temperature until it is cool, then place in the refrigerator until cold and ready to unmold. Serve cold. If you want you can decorate with whipped cream or meringue.

Yields: 4 half cup servings. (I prefer to make only 3 servings) To serve six double the recipe.


I do not use the golden caramel that comes in the custard box because I do not find it's taste pleasing. I feel it tastes like maple syrup, it goes well with pancakes or waffles, but not with flan.

For the caramel:

Many recipe use water and sugar but it always comes out wrong ( for me that is). I now make it like my lovely sister, Miriam, taught me:

In a nonstick pan place  ½ cup sugar and cook over medium heat. The sugar will begin to melt and turn brown at the edges first. With a wooden spoon move the edges from outside to the center to help it melt in a uniform way and prevent it from burning. When all the sugar has melted and has obtain a golden color, it is then ready to cover the mold where you will place the flan. Note: Do not let it turn to dark, or it will taste bitter.


Do not forget to be romantic with your partners. In a few minutes and by a candlelight, you can enjoy this delicious dessert for a special occasion. May love reign in your homes and in your marriages.


Receta en Español para Flan de Chocolate: AQUÍ.

Let us not become weary in doing good, for at the proper time we will reap a harvest if we do not give up.- Galatians 6:9.